 1 / 6
1 / 6Wat heb je nodig?
Naast de geprinte onderdelen:
- 1×Originele Apple MagSafe-lader
- 1×Apple Watch-lader (optioneel)
Beschrijving van de maker
Origineel in het EngelsDescription
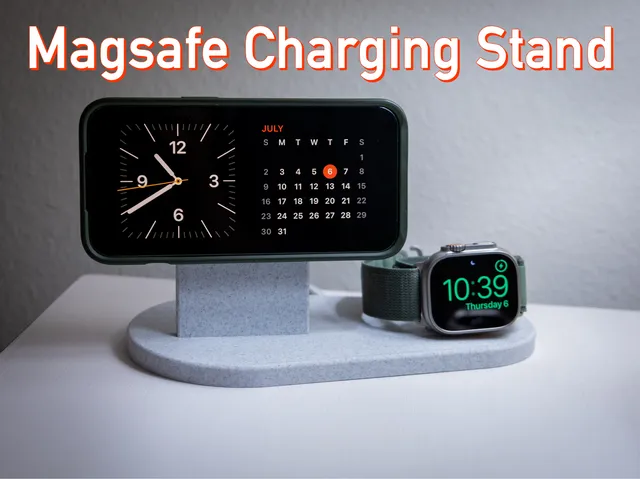
Simple form, easy to print, no supports
Disclaimer: This charger is designed to fit only the original Apple chargers
*2025-02-10 Big Update.
- Currently Apple released 2025 a new charger (Ø 55,5mm and a height of 4,37mm).
- The old charger has the following dimensions Ø 55,9mm and a height of 5.3mm.
I updated the Print Profiles and there are versions now for both chargers. Measure your charger before printing.
The majority of ppl still have the 55,9mm charger.
- I made some minor fixes to the holders.
- Added also a Print Profile with SteelBB support, the printer will automatically stop to add 6-8mm Steel-balls.
Idea
The idea was a maintain a simple form, easy to print in place without need of supports and to hold the 2 chargers without glue. I got my main Inspiration from Thomas and GaryChan_22268 .
4 Bases
- with logo placeholder, so you can print the logo separately
- with integrated logo, you can color it with you slicer manually or not
- Clean base without a logo
- * Update: Added a version for chargers with USB-A plug. Its open in the back
3 Holder
I experimented with various diameter tolerances to achieve the perfect size to hold the chargers without needing glue. The diameter is slightly increasing on the inside. At the back, cables can be hidden and guided to the stand.
* Update: Added a Pro Max model
* Update 2: Added a holder that can hold 2 Apple Watch
* Update 3: Added a holder that can hold 2 Magsafe chargers (for phone and airpods)
* Update 4: As per User request, testing a holder for the new charger
You can find the special holders as STL in the files
What do you need?
- 2 x M3*10-12mm Countersunk Flat Head Bolts DIN 7991 / ISO 10642 / ISO 2009 (both fit)
- Superglue for the logo: it holds without, but to be sure not to lose it, you can put a drop
Printing instructions
I printed all on an Creality K1 in the past
Filament used for the Base is Bambulab Matte Black and for the Logo Creality PLA+ Grey
Parts
Quality
Support
Infill
Brim
Walls
Top-/Bottom Layer
Base and Holder
0.2mm
No
15% Cubic
No
3
5-3
Logo
0.2mm
No
15% Cubic
No
2-3
5-3
Geprint door de community
Bij de bron al 73 keer geprint. Laat hier als eerste zien hoe het bij jou werd.
Reacties 0
Ook handig in bureau
meer zoals dit
 past op Apple MagSafe-lader
 past op Apple MagSafe-lader
Telefoonstandaard met honingraatpatroon en laadopening
door PlatinumStars
 Extern
Plat opvouwbare telefoon- en tabletstandaard (print-in-place)
door Cherry Labs
 Extern