 1 / 6
1 / 6Wat heb je nodig?
Naast de geprinte onderdelen:
- 2 per accessoire×Schroeven M2 of M2,5
Beschrijving van de maker
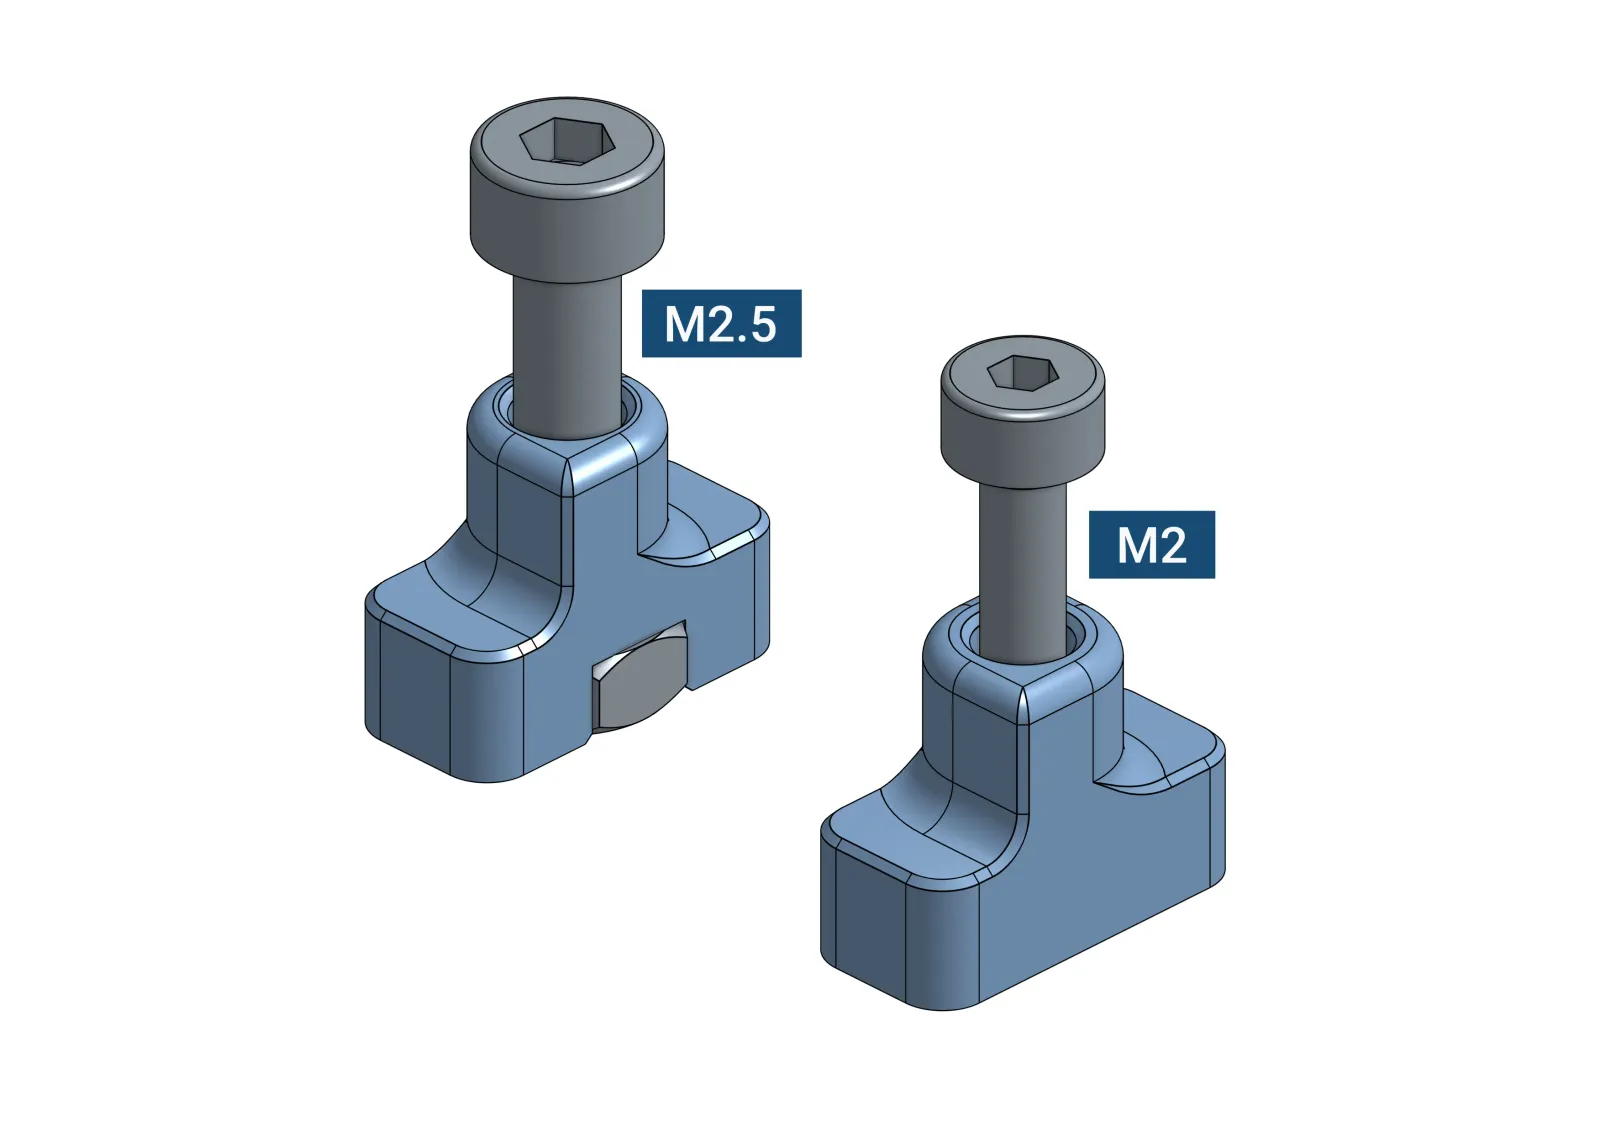
Origineel in het EngelsThese are T-Nuts for IKEA SKÅDIS pegboards that make installing accessories on your pegboard much easier. You no longer have to design custom mounting hooks into your part. All you need is holes and alignment guides. The T-Nuts come in two different sizes for M2 and M2.5 screws. Check out alternatives for M3 in the FAQ section.
In addition to easily creating your own Skadis accessories, you can use the T-Nuts to securely mount other non-printed objects to the pegboard by simply drilling holes with the appropriate spacing and using the separately printable alignment guides.

Discover Skadis Accessories That Use T-Nuts
You can find many Skadis accessories that use the Skadis T-Nuts Mounting System in the Skadis T-Nuts Collection (over 450 models and growing). I regularly add new compatible models that I find to that collection. Also check out the remix section.
If you create a compatible model please use the “skadistnut” tag so I can find it.
How do T-Nuts Work?
The Skadis T-Nuts work the same way as drop-in T-nuts for aluminum extrusions which you might already be familiar with. Turning the screw clockwise (tighten) makes the T-Nut lock in a horizontal orientation and turning the screw counter-clockwise (loosen) puts it back into the vertical orientation. This is due to the lemon-like shape if you look at the T-Nut from the top.
Watch the video below to see how a simple hook that uses T-Nuts can be attached to a Skadis board. It's easy to position due to the integrated alignment guides. The 2nd half shows the perspective from the back of the board where you can see how the T-Nut locks into the horizontal and vertical orientations.
Why T-Nuts Over Hooks and Clips?
-
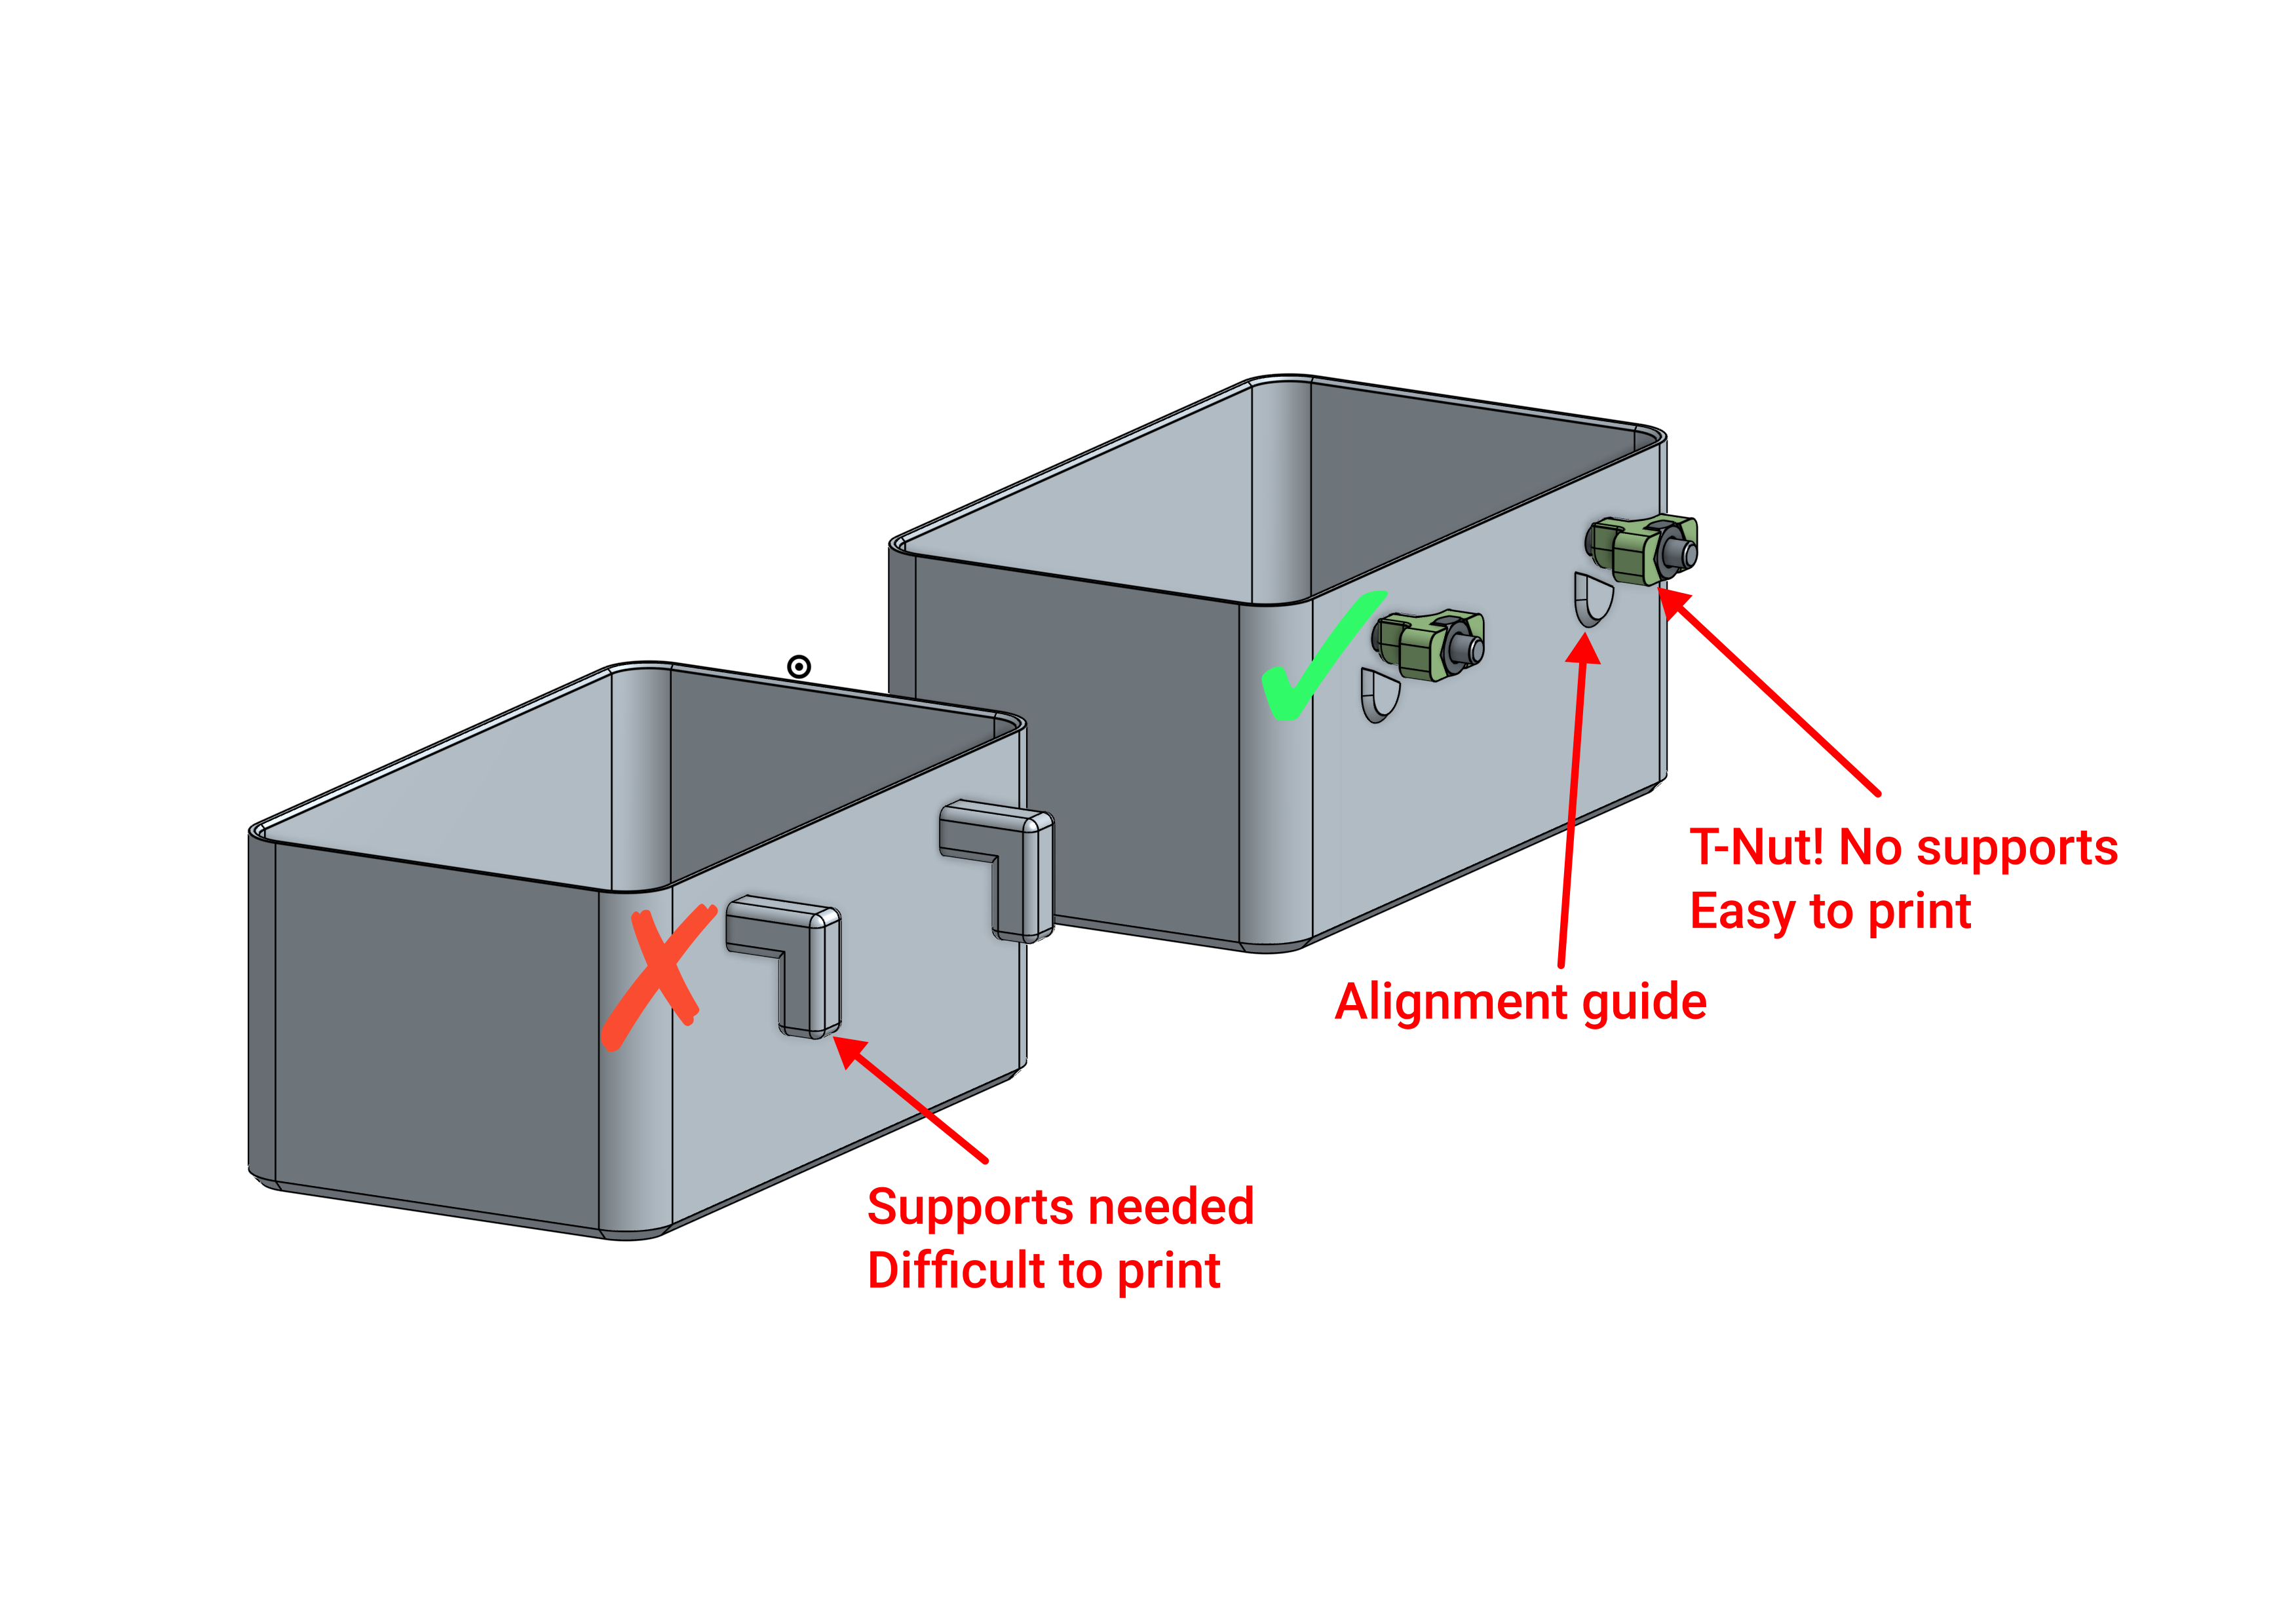
You don't need to design L-shaped hooks into your design that might make your part require support material or make it more difficult to print.
-
Integrated hooks often easily break due to unfortunate layer orientation.
-
Clips can be bulky and not visually pleasing.
-
You don't have to find the perfect tolerances for your hooks. Hooks often have a loose fit or are too tight and difficult to install or remove. T-Nuts fit all the time.
-
T-Nuts provide a very strong hold and are easy to install and remove with a screwdriver without damaging your pegboard.
-
T-Nuts are low-profile, not bulky, and easy to hide in your custom parts.
-
You can convert existing accessories (printed or non-printed) into SKÅDIS accessories by just drilling holes in the right locations.
What Are the Disadvantages?
-
Needs screws. You need one M2 or M2.5 screw and a matching nut per T-Nut. And therefore a screwdriver to install your accessories.
-
There are designs where screw driver access might be difficult to implement.
-
For accessories that are meant to be moved frequently, T-Nuts might not be the right solution. It doesn't take much time but you have to have a screwdriver ready.
-
You should design alignment guides into your part because T-Nuts have to be centered in the pegboard hole. No biggie though. More info below.
FAQ
-
Should I use M2 or M2.5 hardware?
Go with M2.5 if possible. M2.5 screws are stronger and the screw head is larger which distributes the pressure over a slightly larger area which puts less stress on your part. The M2 version exists because M2 screws are sometimes easier to find in hardware stores.
-
Why is there no M3 version?
M3 nuts are too big and wouldn't fit through the holes. The Skadis pegboard holes are 5mm wide and M3 DIN934 hex nuts have a diameter of 5.5mm.However, other designers have developed adaptations of the T-Nuts that work with M3 screws that you might want to check out. Some accessories made for for M2.5 screws can be easily converted to M3 by widening the hole with an 3mm drill bit.
Check out these M3 adaptations:-
Direct screw in T-Nuts by rynn uses M3 and M4 threads that are tapped into the printed part using a tap.
-
M3 T-Nuts by Samuel Häberli uses M3 threads that are tapped into the printed part using a tap.
-
M3 T-Nut that uses brass standoffs by contrapuntal uses M3 hexagonal brass standoffs instead of hex nuts. Standoffs have smaller diameter than DIN934 nuts and fit through the pegboard holes.
-
Threaded T-Nuts for M3 or UNC #5-40 screw by ORM have printed threads and don't require tapping.
-
Threaded M3 T-Nuts by Arough have printed threads and don't require tapping.
-
M3 brass heat-set insert T-Nut by B0rax uses M3 D5.0 L4.0 heat-set inserts instead of hex nuts.
-
-
Alternative M2 versions
M2 DIN934 have a low thread count and may not be as reliable as larger nuts. Check out these alternative M2 versions:-
M2 heat-set insert T-Nut by Roland Deschain works with M2 D3.6 L3.0 and M2 D3.6 L4.0 brass heat-set inserts.
-
M2 heat-set insert T-Nut by hein (unknown heat-set insert spec).
-
BOM - M2.5 Version (recommended)
Qty
Description
Sourcing
1
M2.5 DIN934 Hex Nut
Aliexpress, Amazon (kit)
1
M2.5 Screw (see length calculation below)
Aliexpress, Amazon (kit)
BOM - M2 Version
Qty
Description
Sourcing
1
M2 DIN934 Hex Nut
1
M2 Screw (see length calculation below)
Designing Your Own Skådis Accessories Using T-Nuts
Things to Include in the Description
If you decide to publish your own SKÅDIS accessories that use T-Nuts it'll be really useful for your users if you include the following things in the description:
-
Add the “skadistnut” tag to your project for discoverability.
-
Explain how to use T-Nuts or link to this page which has extensive documentation.
-
Mention the screw diameters (M2 or M2.5) and the required lengths.
Designing
To design your own accessories that work with the T-Nuts you have to add M2 or M2.5 holes with some additional clearance (recommended 0.3mm). Please read the “SKÅDIS Hole Pattern” section below to determine how you need to place the holes.
In order for the T-Nuts to be centered in the pegboard hole, it's necessary to incorporate alignment guides in your parts as well. They make sure that the T-Nuts can rotate freely during installation, your part doesn't slip during installation, and your part doesn't rotate or spin after installation in case you use only a single mounting point.
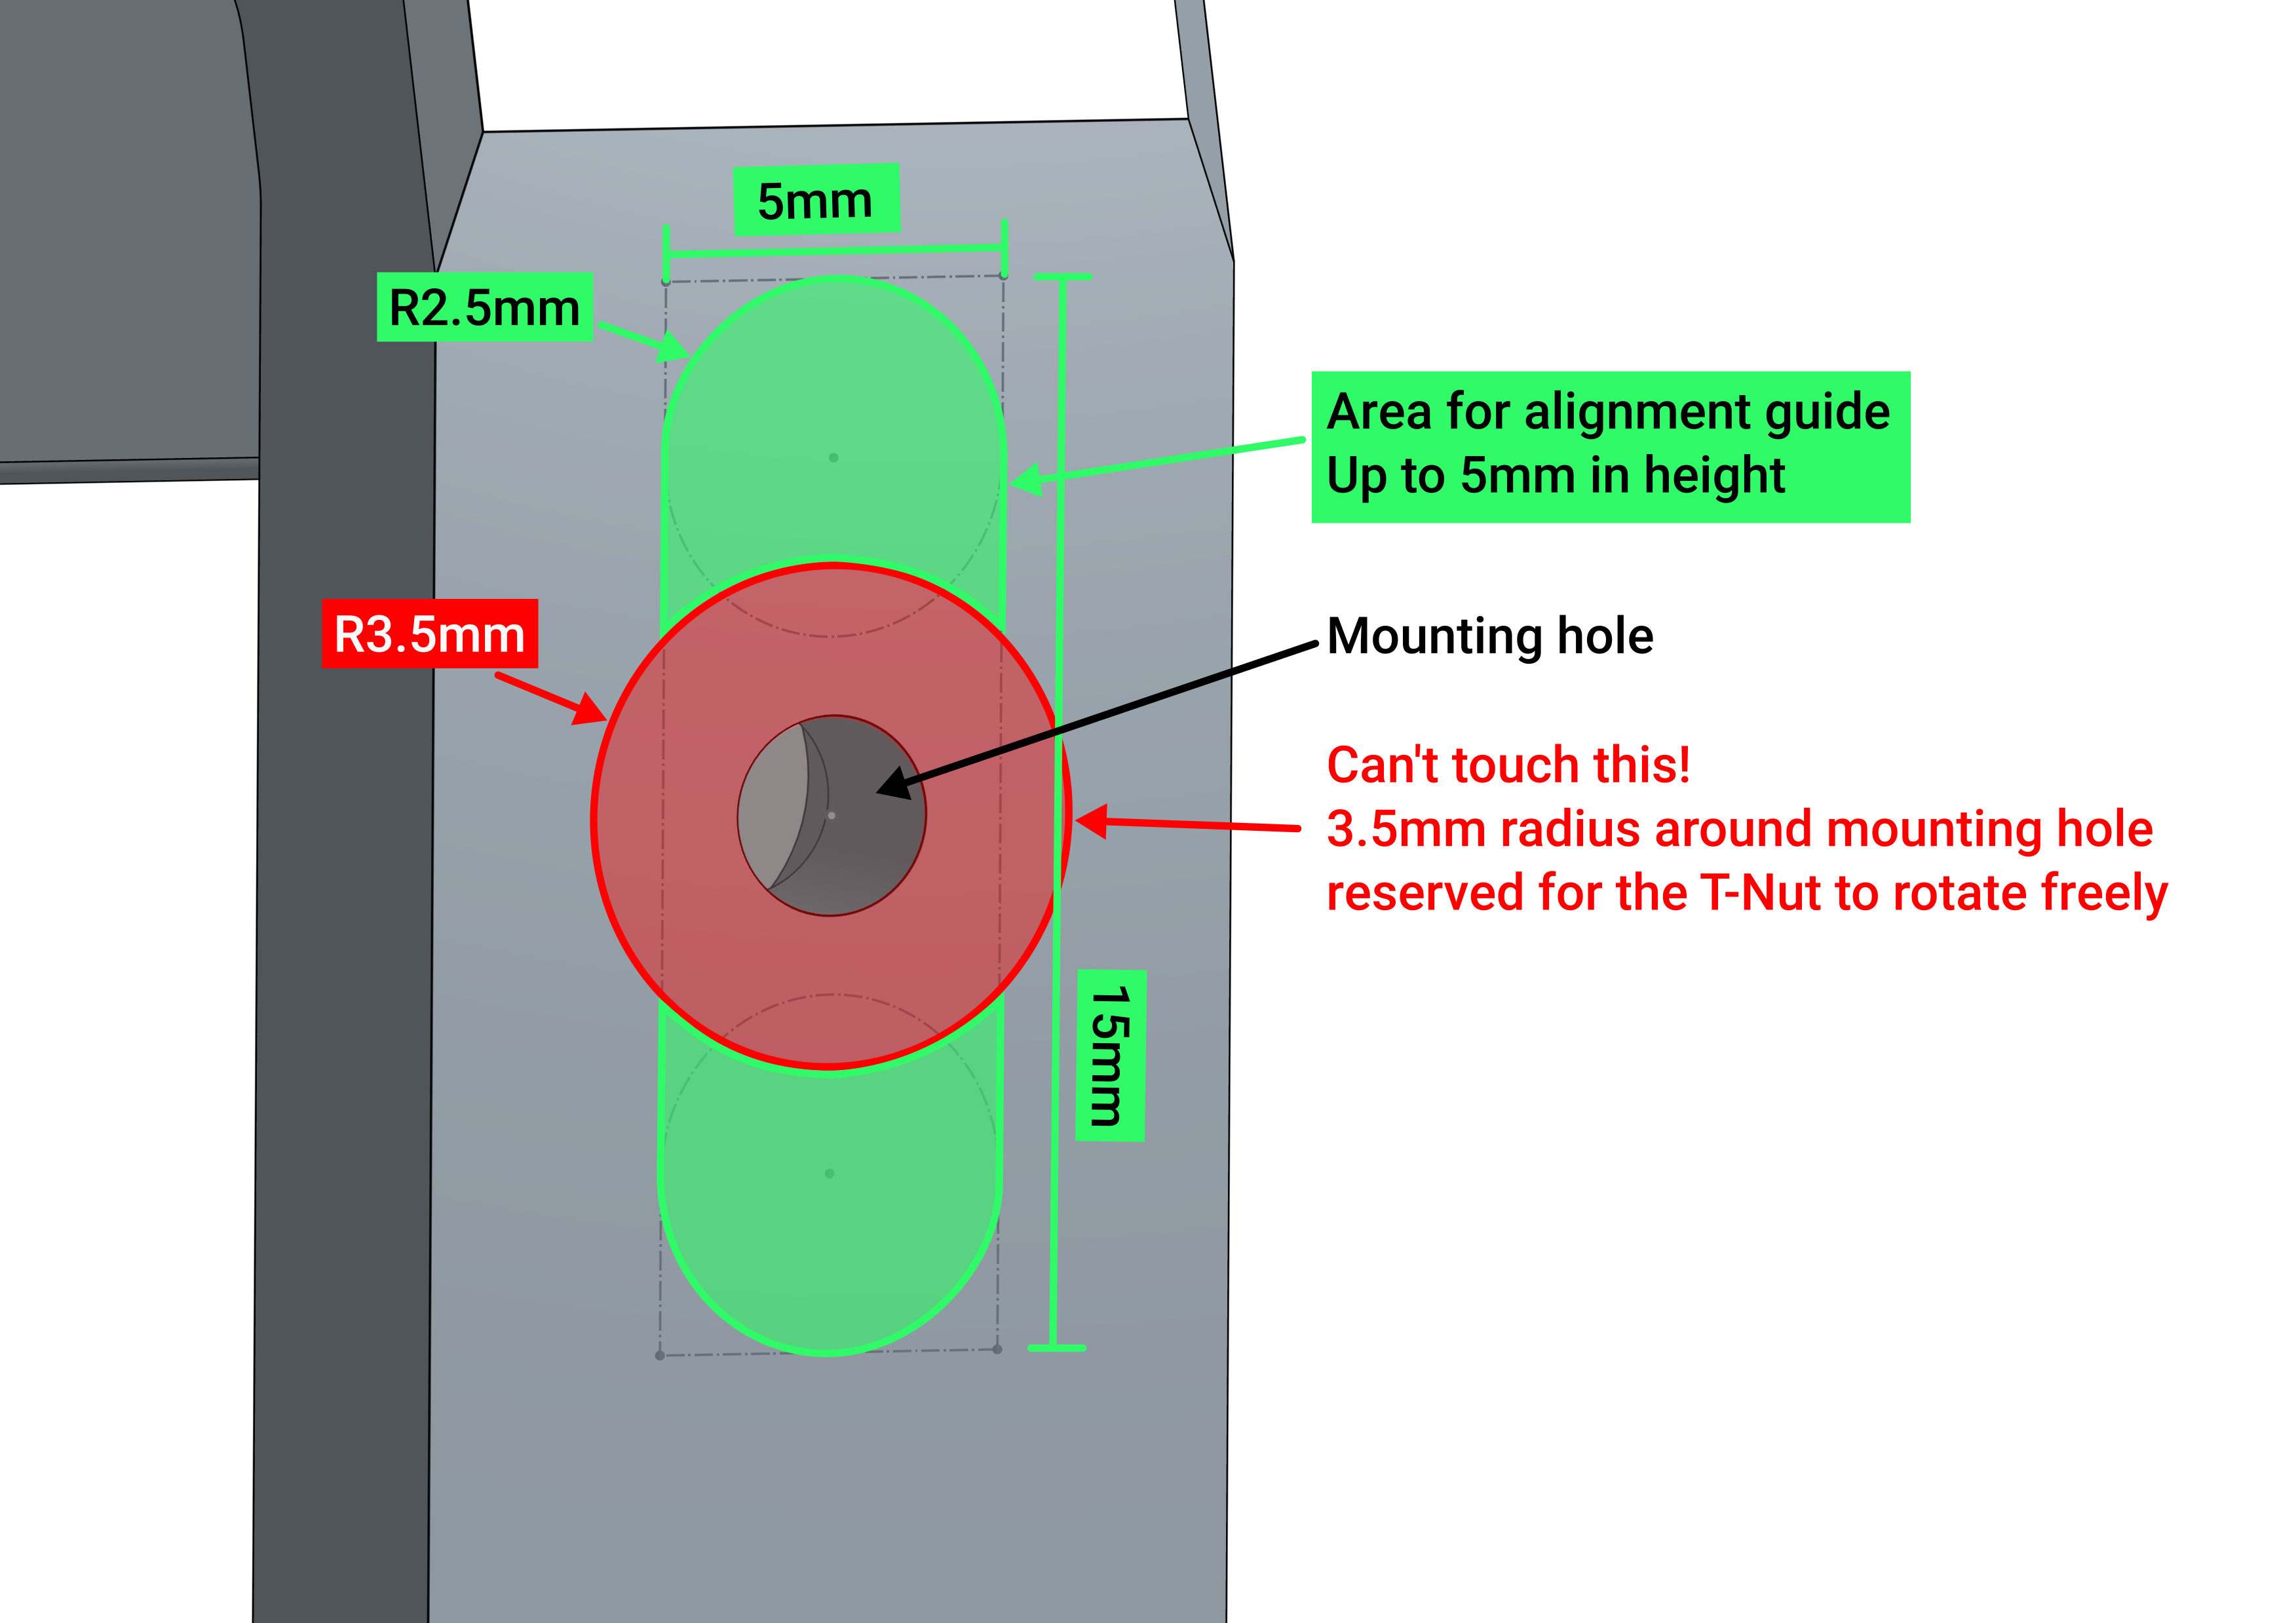
The area around a 3.5mm radius around the center of the mounting hole (red) should remain free of extra material so that the T-Nut can rotate freely. The remaining area in the 5x15mm with a 2.5mm radius at the short edges (green) should be used for the alignment guide.
Note: For alignment guides taller than 1mm a 0.3mm clearance is recommended. Use 4.7mm instead of 5mm and 14.7mm instead of 15mm and a 2.35mm radius.
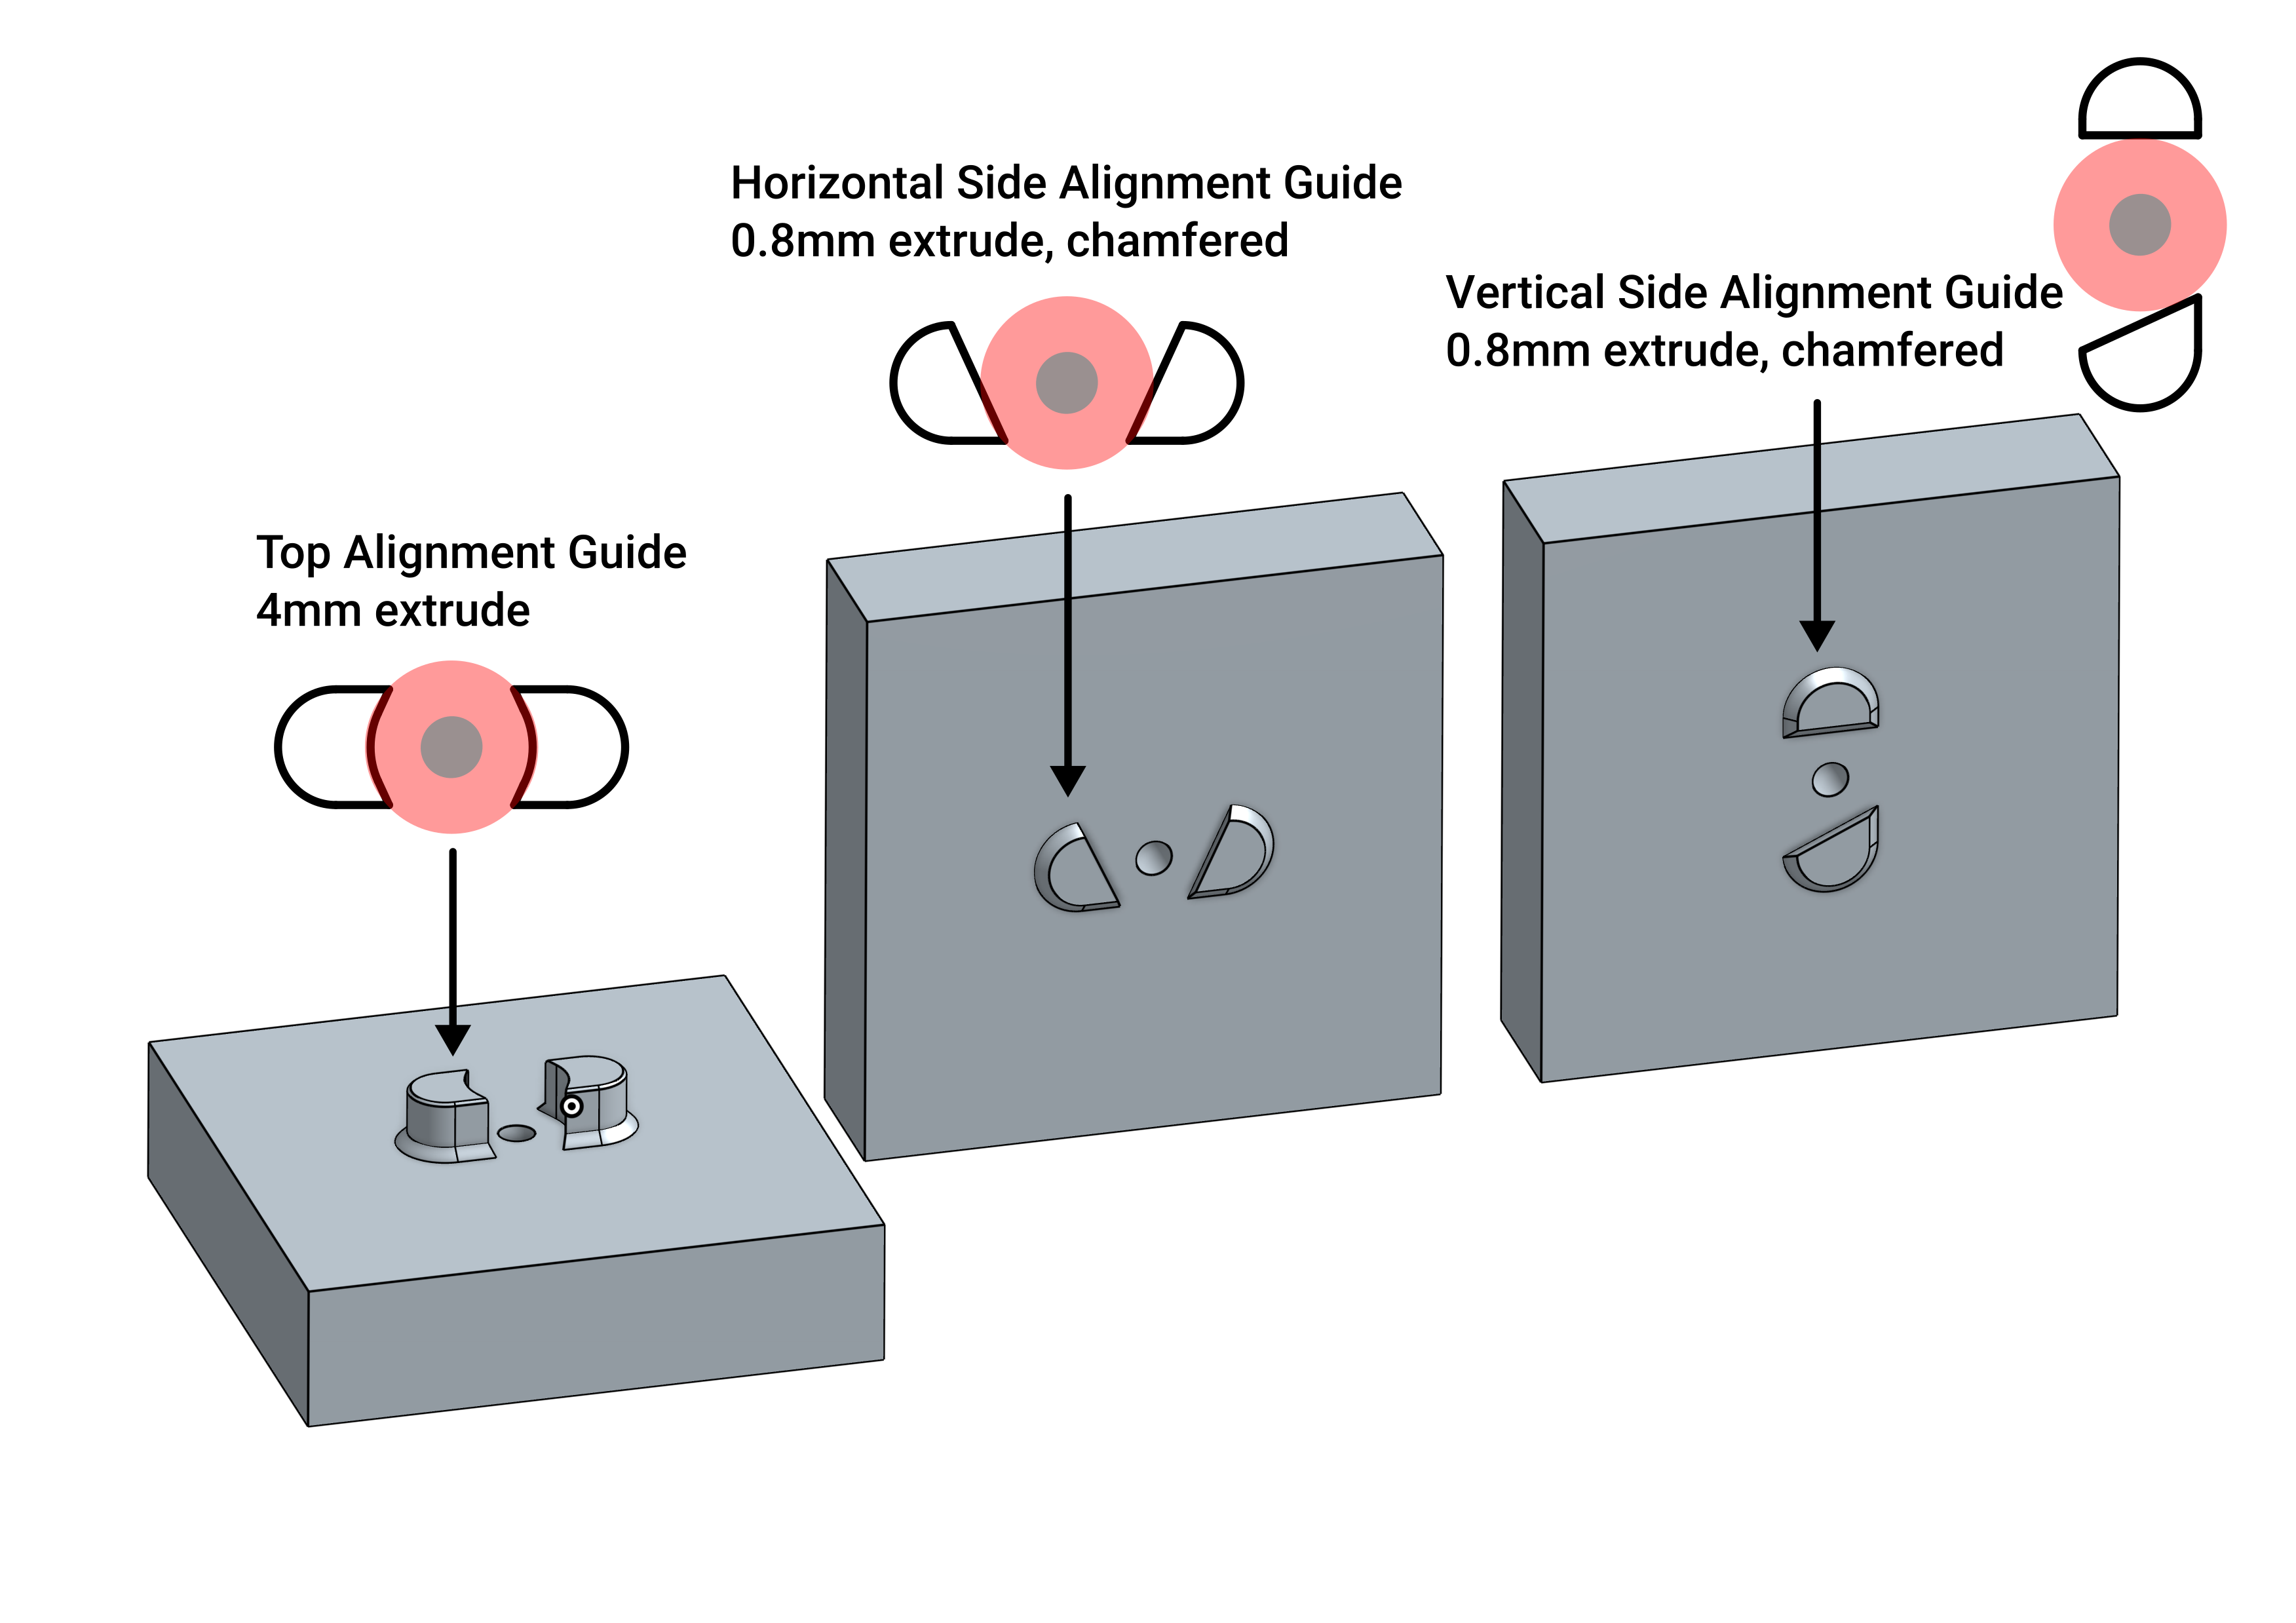
Alignment guides should be between 0.8mm and 4mm tall. Extrude up to 4mm if your alignment guide is at the top of your part (in the printing orientation) and 0.8mm if your mounting hole is on the side of your part. You add a 0.8mm 45deg chamfer at the bottom of the alignment guide so that it can be printed without support material. See examples below.
Here are some examples of alignment guides depending on the position and orientation when printing. If your mounting hold is at the bottom of your part you can print the Alignment Guide (M2 or M2.5) STL as a separate part (see “Mount Anything…” section below).
Design Resources
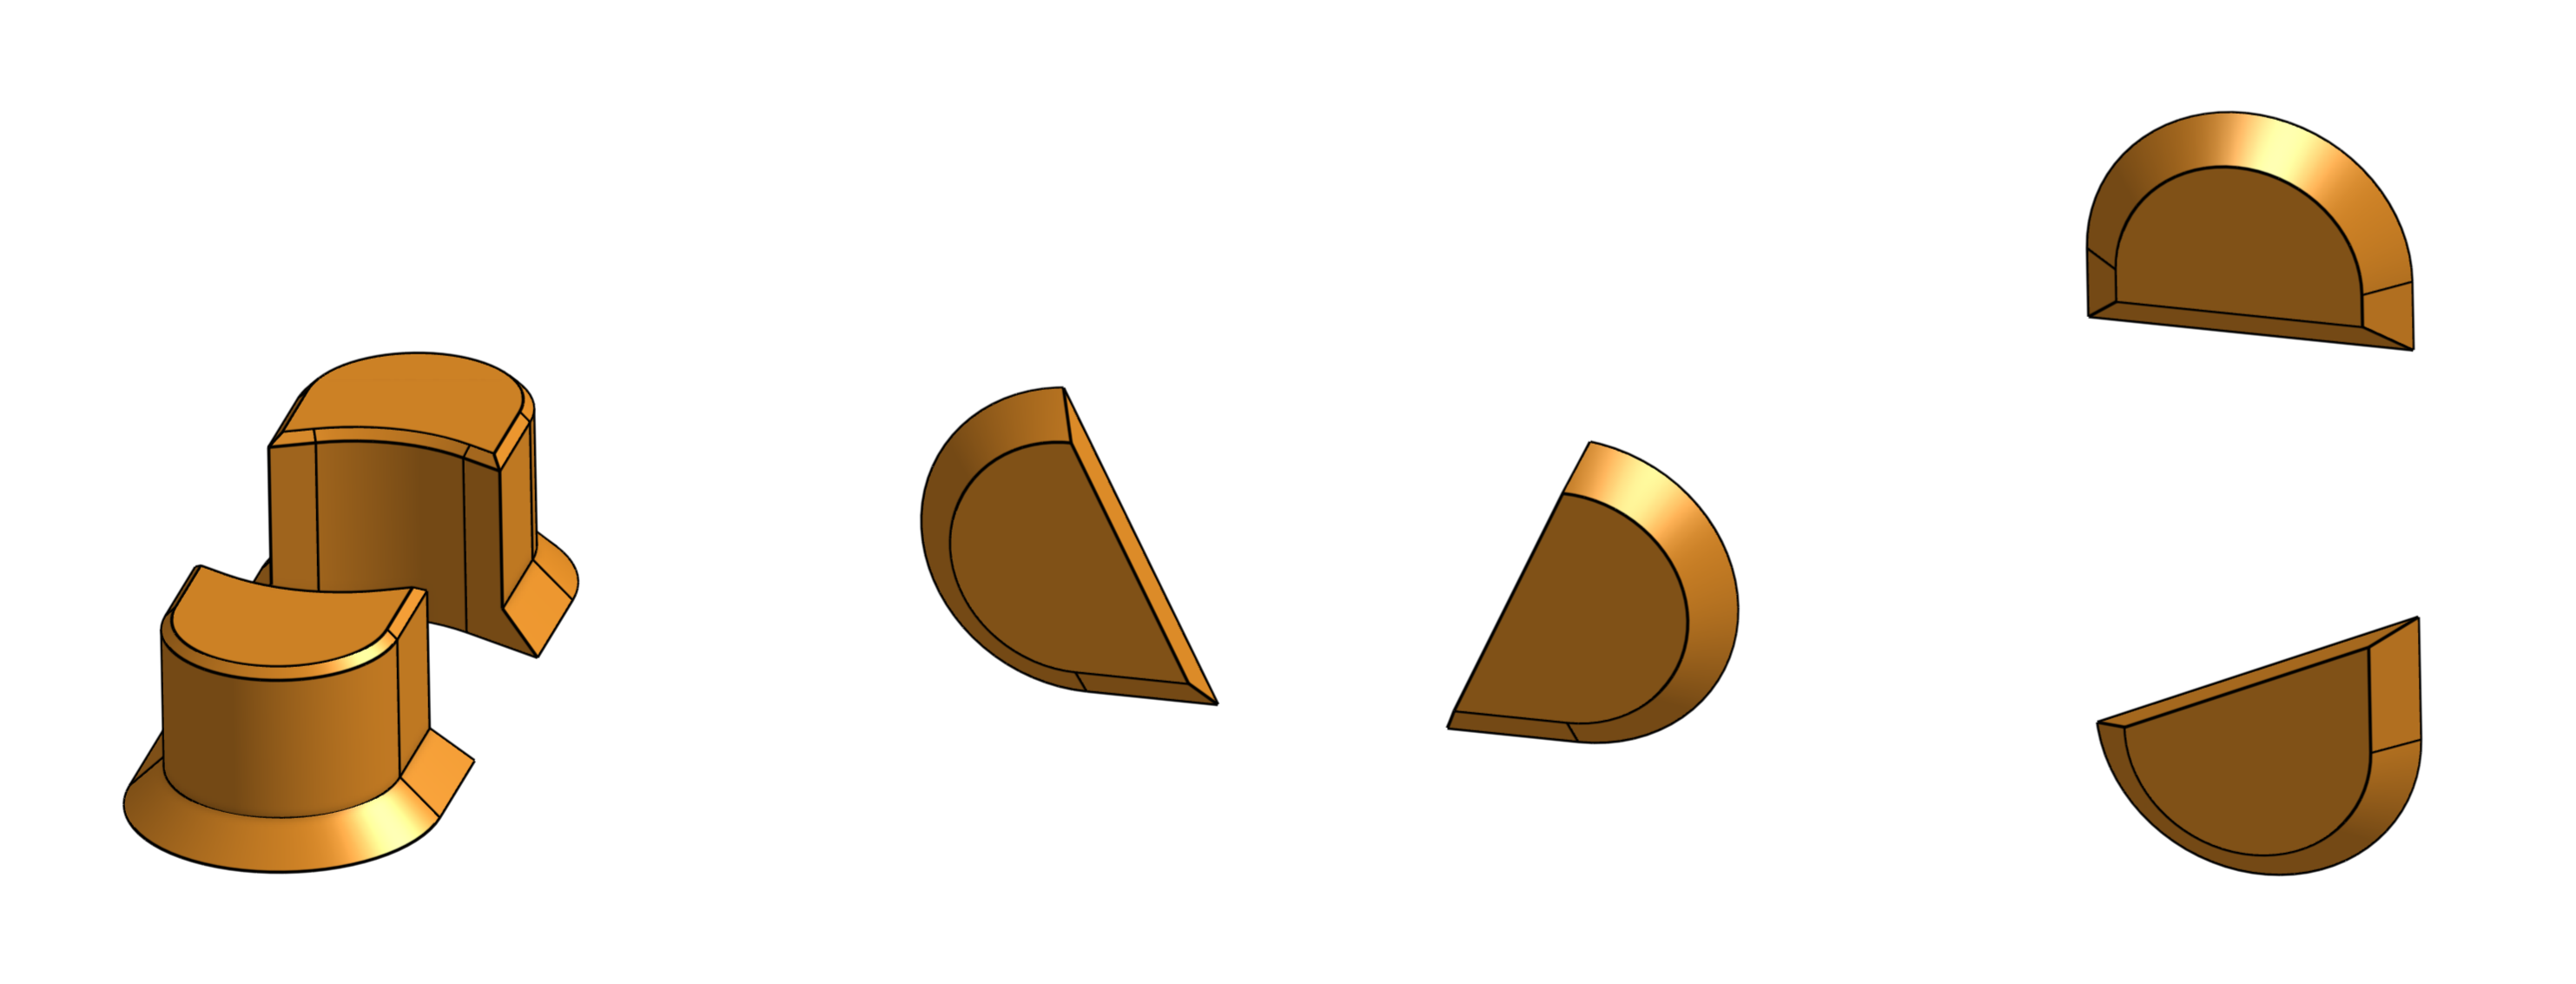
Alignment Guides are available as separately downloadable files that you can add to your models so you don't have to design them yourself. They're available as STEP files for CAD, STL files for mesh-based editors like Blender or Tinkercad, and DXF. Just center the appropriate Alignment Guides over your screw holes.
Take a look at the “Design Resources” folder in the “Files” tab.
Onshape FeatureScript
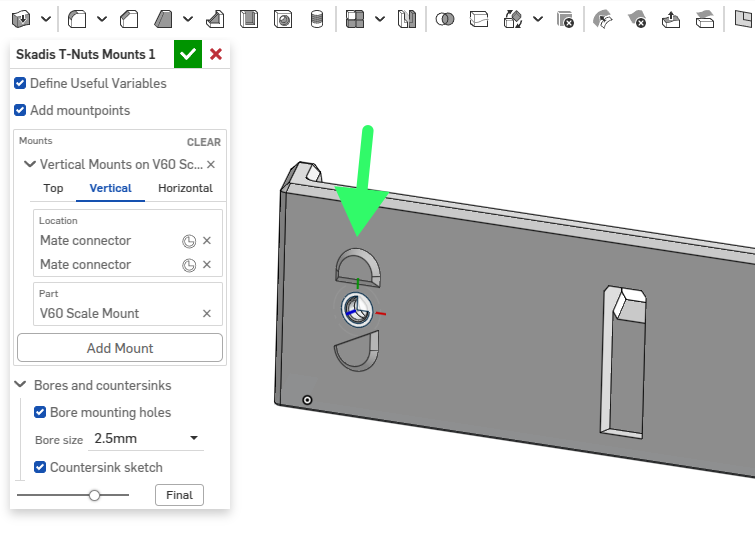
The Skadis T-Nut Support tool FeatureScript for Onshape by @Paradox allows you to add Alignment Guides and matching holes with just a few clicks, without having to design any of the features yourself.
This is a highly recommended add-on for Onshape users.
Also recommended is the 3D Printed Hole FeatureScript by Reese from Ovyl, which automates the creation of teardrop shapes for vertical holes.
Tinkercad
If you design in Tinkercad and would like to integrate the Alignment Guides in your model, download the STL file for the Alignment Guide you need and follow this awesome video tutorial by @juckendes_Auge.
Mount Anything on a Skådis Board
Using the “Alignment Guide M2.stl” or “Alignment Guide M2.5.stl” files you can mount anything on a SKÅDIS board using T-Nuts. Just drill holes (2
Geprint door de community
Bij de bron al 95 keer geprint. Laat hier als eerste zien hoe het bij jou werd.
Reacties 0
Ook handig in opbergen
meer zoals dit
 past op IKEA Skådis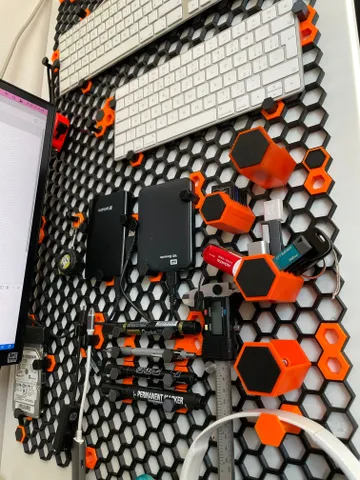
Honeycomb Storage Wall: modulaire opbergwand met haken en bakjes
door RostaP

 past op IKEA Skådis
 past op IKEA Skådis
 past op IKEA Skådis
 past op IKEA Skådis